Estimated reading time: 10 minutes
Ductwork largely refers to that intricate system of tubes or pipes that help distribute heated or cooled air throughout your home. Essentially, they are the veins of your whole HVAC (heating, ventilating, and air conditioning) system. A sound ductwork network ensures even air distribution, keeping your living spaces warm during chilly winters and cool during sweltering summers, effectively helping uphold an optimal home environment.
Read More:
Notably, though, while ductwork is essential, it isn’t exactly the most beautiful part of your home, especially when it snakes its way through your cozy basement. Exposed ductwork can dampen the aesthetic appeal of your space, make ceilings appear lower, and even disrupt your remodeling or finishing plans. Therefore, hiding ductwork is key to maintaining a clean, harmonious, and uncluttered appearance in your basement while ensuring your home climate is in tip-top shape. The question that often arises is, how do you do it? Stay with us; we have put together a handful of practical, efficient, and aesthetic ways to help you hide ductwork in your basement.
Table of contents
1. Use Paint
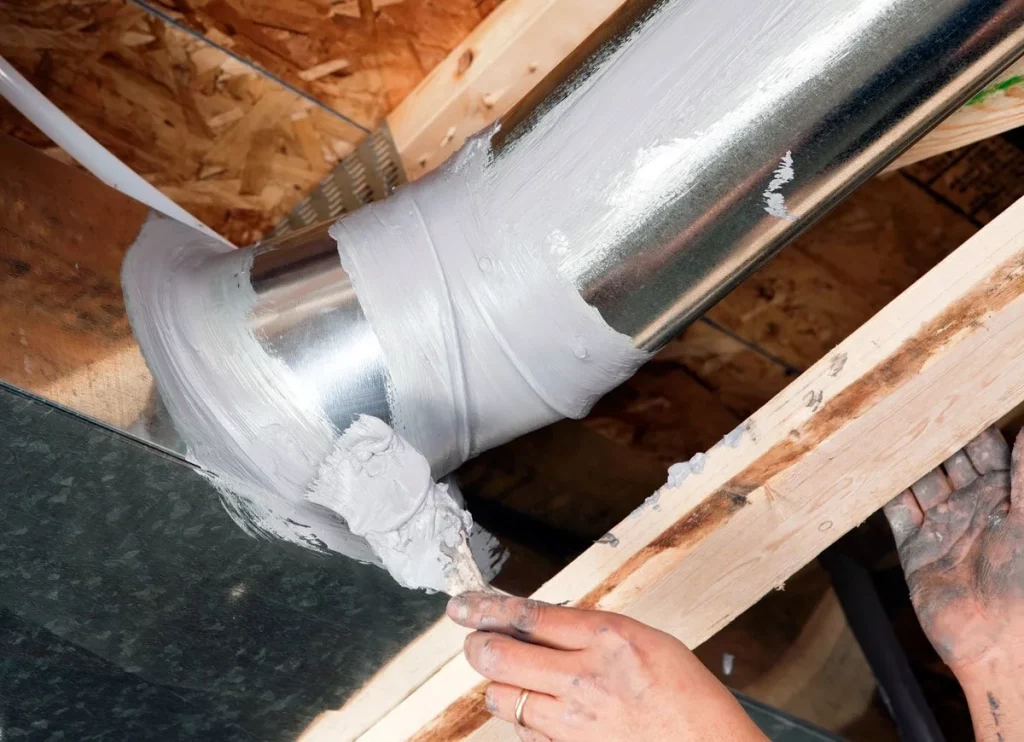
The first solution that we’re going to explore to hide ductwork in your basement is through the use of paint. This relatively simple, cost-effective approach leans heavily on the power of color schemes to make your ductwork blend in with the rest of your basement.
Steps to painting ductwork for concealment
Here are the easy-to-follow steps to paint your ductwork:
1. Clean the ducts: Start by thoroughly cleaning your ductwork to remove any dust or grease that could prevent the paint from adhering properly. Use a damp cloth or vacuum to do this.
2. Prime the ducts: Use a primer for metal surfaces to prime your ductwork. Keep in mind to apply it evenly and allow it to fully dry.
3. Paint the ducts: Choose paint that matches the color of your ceiling or walls. Remember that lighter colors, such as white or cream, can make the ductwork appear less noticeable. Make sure to apply at least two coats to get the best finish.
4. Seal the paint: To prevent it from chipping or peeling down the line, seal it with a clear, protective finish.
Pros and cons of using paint
The major advantage of using paint is that it’s affordable and quite easy. It’s a DIY-friendly solution that requires minimal tools and expertise. Plus, you can customize the look to complement your basement’s overall design.
However, there are a few potential downsides. First, the preparation work, including cleaning, priming, and sealing, can be time-consuming. If you have a large area of ductwork, it might take a couple of days to finish. The paint can also peel or chip over time, requiring touch-ups. Lastly, while this method does help to make the ductwork blend in with your surroundings, it doesn’t entirely conceal them.
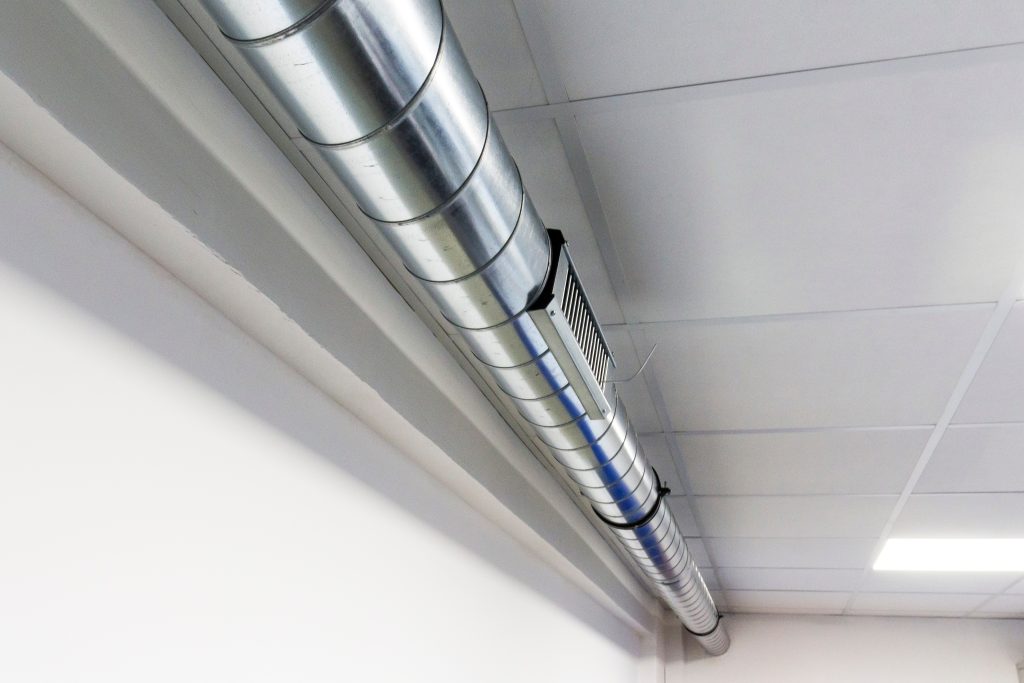
2. Install a Drop Ceiling
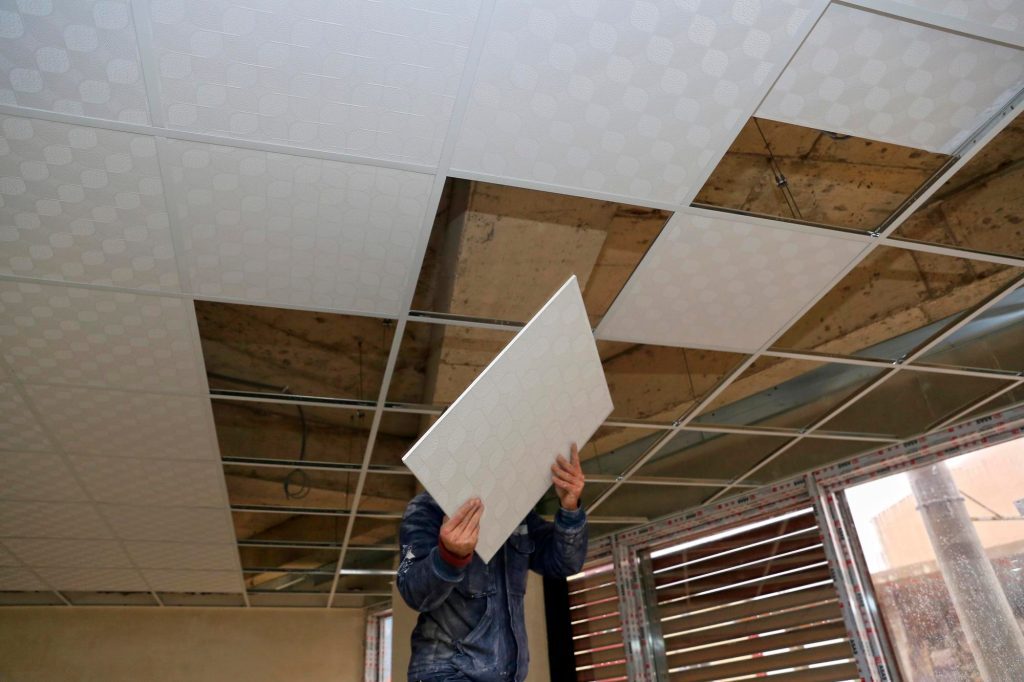
A drop ceiling (also called a suspended ceiling) is a secondary ceiling hung below the main structural one. It is often used in commercial buildings and homes to conceal ductwork, wiring, or plumbing, especially in basements. It consists of a lightweight metal grid suspended by wires from the original ceiling, into which lightweight panels are inserted.
Installing a drop ceiling is relatively simple, yet it requires careful planning and accuracy. Here are the basic steps you can follow:
1. Measure and Plan: Determine the height of your drop ceiling, considering a minimum clearance of 7 feet for living spaces. Draw a ceiling layout on graph paper, noting where each suspended ceiling frame will be installed.
2. Install the Wall Moulding: Your drop ceiling must start with a firm, well-attached perimeter, where you’ll mount the L-shaped wall molding.
3. Install the Suspension Wires: Once the perimeter molding is in place, hanging the main T-bars is next. Suspend these from the ceiling joists with wire hangers. This is the framework where the tiles will be placed.
4. Install the Cross T-bars: Add the 2-foot cross T-bars to the main T-bars with soft taps from a rubber mallet.
5. Insert Ceiling Panels: Use the right size ceiling panels or tiles, gently placing them on the grid, ensuring they are level and evenly spaced.
The advantages of a drop ceiling are numerous. It’s excellent at hiding unsightly ductwork, wiring, and plumbing while providing easy access to these utilities. Additionally, the drop ceiling panels can improve the room’s acoustics and even help with energy efficiency, depending on the type of tiles used.
However, there are a few disadvantages, as well. Drop ceilings can reduce the height of your room, which may be an issue in basements with already low ceilings. Design-wise, some people may find the appearance of a drop ceiling less appealing or less modern when compared to other options. Additionally, badly installed drop ceilings can sag over time or get damaged easily. Thus, accurate planning and careful installation are extremely important.
3. Change Your Ducts
One of the most effective ways of hiding ductwork in your basement is by changing your old ducts. It’s effective for several reasons. Old systems are often larger and more awkwardly shaped than newer models, taking up more space and posing a greater visual annoyance. Secondly, outdated ductwork can be less energy-efficient, leaving you with larger utility bills. So, you might be improving the aesthetics of your basement and your home’s energy consumption at the same time. Furthermore, replacing your ductwork allows you to reevaluate and potentially reconfigure the layout, making it easier to conceal.
Guide to choosing and installing new ducts
Choosing the right ducts for your house is a task that requires careful planning. Ask a professional for advice on the type of duct appropriate for your home, bearing in mind your budget, the available space, and the specific needs of your HVAC system. There are two main types to choose from: Flexible ducts, which are lightweight, cost-efficient, and easy to install, and metal ducts, which are more long-lasting and resistant to punctures and tears but harder to install and more expensive.
When it comes to installation, unless you are an experienced DIYer, I recommend enlisting the help of professionals. They can ensure that your new ductwork is properly sealed, insulated, and, most importantly, arranged so that it is less visually intrusive.
Pros and Cons of Changing Ducts
As with any other solution, changing your ducts has benefits and drawbacks. On the plus side, new ducts can drastically improve your home’s energy efficiency and comfort. You’ll note less dust, consistent room temperatures, and lower energy bills. Plus, smaller, sleeker ducts are often easier to hide in the basement.
On the downside, changing ductwork requires substantial time and money. It’s also quite intrusive because it often involves tearing into walls, ceilings, or floors. Therefore, it’s a decision that requires thought, planning, and budgeting to ensure that the benefits outweigh the costs.
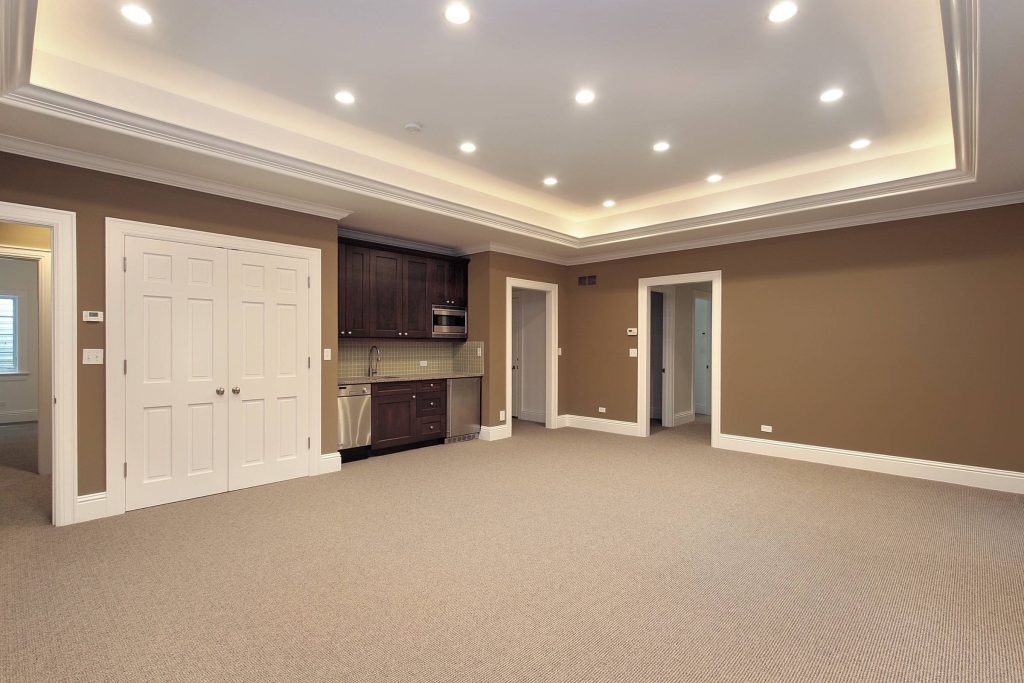
4. Soffits Or Tray Ceilings
Soffits and tray ceilings are clever architectural solutions often employed for aesthetic enhancement and utility concealment. Predominantly used in kitchens as a bridge between cabinets, soffits are, in fact, versatile. They are extensions of a wall, ceiling, or arch and effectively mask and blend in ductwork, plumbing, and wiring. Tray ceilings, on the other hand, get their name from their inverse tray-like appearance and are known for their depth and dimension. They add height and depth to a room and can also effectively hide ductwork.
Steps to Incorporating these into Your Basement
To incorporate soffits or tray ceilings to mask ductwork in your basement, you would want to hire a professional unless you are proficient in carpentry and construction. The steps generally involve:
1. Measuring the area: Improvement begins with accurate measurements of the ductwork and the part of the basement it occupies.
2. Creating a Framework: Your contractor will determine the size of the soffit or tray ceiling and will construct a framework with the help of wooden beams or metal studs.
3. Drywall Application: The next step involves attaching drywall to this framework and securing it. The drywall is then primed and painted.
4. Finishing: The last step includes the installation of crown molding or another decorative piece if you desire that extra touch of sophistication.
Benefits and Drawbacks of this Method
Soffits and tray ceilings not only hide ductwork but also elevate the aesthetics of your basement. They add a decorative touch, making the area feel larger and more spacious. However, installing these architectural features can be pricey and time-consuming. Also, soffits and tray ceilings reduce the height of your basement, which can be an issue for taller individuals or if the basement already has a low ceiling. Yet, with their remarkable ability to blend utility with decor, soffits and tray ceilings can revolutionize your basement.
5. Fake Beams
If you’re looking for a more unconventional and aesthetic way to hide your basement ductwork, fake beams could be your answer. These hollow, decorative structures mirror traditional structural beams’ appearance. Fake beams are crafted from materials like polyurethane, plastic, or lightweight wood. They can be designed to complement the interior decor of your basement. The best part? They provide the perfect cover for your unsightly ductwork.

Steps to Install Fake Beams
Installation of fake beams needs precision and keen attention to detail. Here are the steps to guide you through the process:
1. Take Accurate Measurements: Measure the length, width, and depth of your ductwork to determine the size of your faux beams. Make allowances for any modifications or adjustments that might occur during installation.
2. Choose Your Beams: Next, decide on the type and style of faux beams that suit your aesthetic preferences and the style of your basement. Options usually include different colors, textures, and faux wood types.
3. Mounting the Beams: Start the installation process once you’ve picked a style. Fasten the hollow beams to the ceiling, ensuring they encase your ductwork.
4. Secure the Beam: After positioning the beams, ensure they are secured to the ceiling.
5. Review the Installation: After installing the faux beams, inspect the installation to ensure the ductwork is adequately concealed.
The Advantages and Disadvantages of Fake Beams
Like every other method, using fake beams comes with its own pros and cons.
Advantages: Faux beams add to the aesthetic value of your basement, transforming an otherwise wasted area into a beautiful, functional space. They’re lightweight, making for easier and safer installation. Plus, they require minimal maintenance while providing an effective cover for the ductwork.
Disadvantages: On the downside, faux beams may only fit into some home decor styles, and smaller basements may feel crowded with these beams. Additionally, installation can be tricky, and you must ensure the beams are securely mounted. Last but not least, while they can be affordable, the price tag can increase depending on the beams’ type, quality, and finish.
In sum, if you wish to give your basement a visually appealing face-lift while hiding the ductwork, fake beams can be a worthwhile consideration.


